Fig. 1 · Fig. 2 · Fig. 3
Fig. 4 · Fig. 5 · Fig. 6
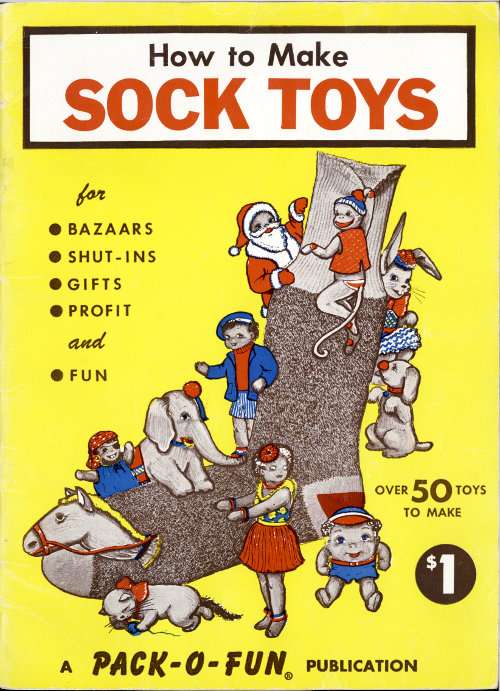
BASIC INSTRUCTIONS FOR PAGES 17 AND 20-27
Step 1
Turn Sock No. 1 inside out. Stitch across the heel to form a straight sock.
Step 2
Cut 1½″ off rib of sock so that legs are in proportion to length of body.
Step 3
Start 3″ from heel and sew two seams, ⅛″ each side of center line and across end of rib.
Step 4
Cut sock between seams and 1″ farther to make opening for the stuffing.
Step 5
Turn sock right side out. Stuff foot plumply and tie loosely with string to form head.
Step 6
Pull head forward so that white toe becomes face and stitch to chest with strong thread.
Step 7
Stuff legs and body. Sew up opening and mold figure for desired shape.
Step 8
Bend end of legs and sew a tuck to hold feet. Tie string around ankles.
Step 9
From Sock No. 2 cut arms about 5″ long. Turn inside out, seam, turn right side and stuff.
Step 10
Sew arms to sides of body and tie of each wrist with string about 1″ from end.
Step 11
Make three long stitches for finger separations and shorter ones for the thumbs.
Step 12
For the ears, cut two 1½″ circles. Fold in half and overcast along edges. Sew to head.
GIRL DOLL
Fig. 1 · Fig. 2
Follow basic instructions for doll above.
FEATURES: Stitch black yarn eyelines, add long brown lashes and blue button eyes. Make three short stitches to form upturned nose. Cut a smiling mouth from red felt. Add a long stitch of white yarn to separate lips (Figure 1).
HAIR: Choose from styles on page 32 and add a big bow ribbon to top of head.
DRESS: Make a petticoat from pattern design A-13, page 29. Fit the petticoat by gathering at the waist and fastening at the back (Figure 2). Cut a skirt from the same pattern design. Use pattern design B-7, page 28, for the blouse. Gather the skirt and sew to blouse to make dress. Edge dress with rick rack or ribbon and fit to doll with opening in the back. Sew little buttons down the back to close dress. Tie a wide ribbon around waist, ending with a big bow.
SHOES: Use matching felt and cut from pattern design F-27, page 30.
PANTIES: Cut from pattern design C-3, page 29 in white cotton and trim to match dress.
FINISHING TOUCHES: Use a curtain ring for a bracelet. A string of beads around the neck will hide the seam.
PIXIE
Fig. 1 · Fig. 2 · Fig. 3 · Fig. 4
Follow basic instructions for doll on page 19.
FEATURES: Embroider slanted eyes, wide open, and turn the eyebrows up a little at the outer edge. With red yarn, make a smiling mouth. The nose is an arc of brown yarn (Figure 1).
HAIR: See method H-29, page 32.
EARS: Cut two petal-shaped ears from pink felt. Sew to head, folding a little as you sew (Figure 2).
JACKET: In green felt or semi-stiff material, cut from pattern design A-6, page 28. Seam and fit to doll, opening at the front. Cut a “V” in the back at the waist to form tails and sew a small button at the top of the “V”. Trim sleeves into points. Tie a tiny bow at the neck front to pull the jacket closed (Figure 3).
PANTS: Use green or yellow felt, cut from pattern B-2, page 29. Trim the leg edges to match the jacket. Fit to body and hide raw edges with a strip of ribbon or felt.
SHOES: Use brown felt and cut from pattern design C-24, page 30. Sew a little jingle bell to toes and trim edges (Figure 4).
HAT: In green or yellow felt cut eight petal shaped pieces. Stitch together by overlapping petals into a large daisy. Overlap last two petals to fit head (Figure 5). Stitch a bell or pom pom on top.
SOLDIER
Fig. 1 · Fig. 2 · Fig. 3 · Fig. 4
Follow basic instructions on page 19.
FEATURES: Embroider eyes in brown yarn, nose in beige and mouth in red (Figure 1).
HAIR: Choose from methods on page 32.
PANTS: Cut from black or dark blue material, pattern design A-1, page 29. Sew a narrow stripe down outside of legs. Tuck waistline to fit.
COAT: Use bright red felt, or semi-stiff material, following pattern design A-6, page 28. Do not slit at middle front, rather slit to one side (Figure 2). To hide stitches, sew on a strip of felt, and add four small brass buttons down each side. Use white felt strips, ½″ by 11″ for cross piping. Cover front and back seams with a black leatherette belt. Make two epaulettes for shoulders from 1½″ long fringed ovals of yellow felt (Figure 3).
SHOES: Cut from black felt, pattern design A-22, page 30.
HAT: Cut from black felt, pattern design B-16, page 31. Loop gold or white silk cord across front and add a narrow chin strap of black felt (Figure 4).
FINISHING TOUCHES: Sew a little buckle to the front of each shoe. Cut a strip of ½″ wide white felt to fit snugly around the neck. Tuck coat into this band and fasten in front with a brass button. Use the same cord material as on hat and loop around coat buttons (Figure 5).
ENGINEER
Fig. 1 · Fig. 2 · Fig. 3
Follow basic instructions for doll on page 19.
FEATURES: Sew on two small brown buttons for eyes. Embroider lashes and upturned nose with brown yarn (Figure 1). A quarter-size ring of red felt makes a mouth.
HAIR: See page 32 for short hair styles.
OVERALLS: Cut from blue and white striped material, pattern design A-1, page 29. Seam and turn. Sew a 2″ square of the same material to each side for pockets and a 2″ square, hemmed on three sides, for bib. For straps, use two strips of material and add tiny buckles in front (Figure 2).
SHIRT: Cut from soft blue material, pattern B-7, page 28, and fit to body, tucking in at waist.
HAT: Cut a ½″ wide strip of black felt to fit around the head. From the same overall material, cut a 7″ circle and gather to fit band (Figure 3). A visor is made from a 3″ circle of black felt folded in half and sewn around edges. Stitch to front of hat.
SHOES: Cut from black felt, pattern design A-22, page 30.
FINISHING TOUCHES: Tie a small red tri-cornered handkerchief around neck and tuck a bright scrap of material in one pocket.
DUTCH GIRL
Fig. 1 · Fig. 2 · Fig. 3
See basic instruction for doll on page 19.
FEATURES: Stitch a black eyeline with yarn, add long black lashes and blue button eyes. Make three stitches to form a turned up nose. Cut a mouth from red felt and sew to face. Separate lips with a long white stitch (Figure 1).
HAIR: See method N-34, page 32 for braided hair.
DRESS: Cut blouse from soft blue material, pattern design B-7, page 28. Fit to doll with opening at back. Cut skirt from the same material, using pattern design B-14, page 29. Gather around waist with small stitches and fit over blouse. Trim both pieces with rick rack or ribbon. The apron is a 6″ square of white organdy gathered at one edge and sewn to an 18″ strip of white ribbon. Tie the apron over the waist to hide the seam (Figure 2).
PANTIES: Cut from white cotton material, pattern design C-3, page 29 and trim with narrow lace.
SHOES: Use felt to cut from pattern design B-23, page 30. Embroider a tiny flower on each toe.
HAT: Use a 3″ by 11″ piece of crisp white fabric and a smaller piece for the back (Figure 3). Gather the larger piece to fit the back and hem edges. Turn the lower corners of the hat back from the face. A tiny safety pin will hold the hat in place.
SCOTCH LASS
Fig. 1 · Fig. 2 · Fig. 3
Follow instructions for doll on page 19.
FEATURES: Cut one dime-size circle of white felt and cut it into two. Sew each half on for an eye, curved side up. Sew tiny flat buttons to one side. With black yarn, make six long lashes over each eye (Figure 1).
HAIR: Choose a style on page 32.
BLOUSE: Cut from soft white material, pattern design B-7, page 28, and dress doll with opening in back.
SKIRT: Use permanently pleated plaid material and cut a skirt that reaches to the knees (Figure 2). Sew to blouse with opening at back. Use a strip of brown felt or oilcloth to hide the seam. Over this, stitch a circle of fur about 4″ across. The Scotch call this a sporran (Figure 3). Drape a length of ribbon, about 1″ wide and 9″ long, over one shoulder, tucking the ends under the belt.
HAT: Cut from green or red felt (to match dress) from pattern design C-17, page 31. Add a tiny pom pom for a gay touch.
SHOES: Cut from black felt or oilcloth from pattern design A-22, page 30.
PANTIES: If desired, cut from black felt or jersey pattern C-3, page 29.
MEXICAN BOY
Fig. 1 · Fig. 2 · Fig. 3
Follow basic instructions for doll on page 19.
FEATURES: Embroider eyes in black yarn, nose in brown. Cut a smiling mouth from red felt, snipping out some from the middle (Figure 1).
HAIR: See page 32 for choice of styles.
JACKET: Cut from bright colored felt, pattern design A-6, page 28. Make a scarf in striped cloth or from a brightly striped sock to drape across one shoulder (Figure 2).
PANTS: Cut from brown or black material following pattern design D-4, page 29. Trim sides of legs with rick rack or ribbon. Fit to body, tucking at waist with the jacket inside the pants. To hide the seam, fasten a cummerbund of red felt or oilcloth.
SHOES: Cut in black felt from pattern design A-22, page 30. Decorate with sequins or beads.
HAT: Cut from matching felt, pattern A-15, page 31. Shape with fingers into a high Mexican hat (Figure 3).
CHINESE BOY
Fig. 1 · Fig. 2 · Fig. 3
Follow basic instructions for doll on page 19.
FEATURES: Embroider slanted eyes in black yarn, nose in brown and smiling mouth in red (Figure 1).
HAIR: Follow method M-33, page 32, stitching yarn at the back of the head only to braid into a pigtail.
JACKET: Use colorful satin or shiny cotton and cut from pattern design A-6, page 28. Make sleeves wider at the wrist end. Opening will be in the front.
PANTS: In contrasting satin material, cut from pattern design E-5, page 29. Leave a 1″ opening at the ankle of each leg (Figure 2).
SHOES: Cut from red felt from pattern design A-22, page 30. Turn tops of shoes down a bit and trim with sequins or beads.
HAT: Cut a circle of felt 8″ across. Make a slit from edge to the middle. Overlap slit edges to form a coolie hat (Figure 3). Then measure around the head and make a ½″ wide band of felt. Whip stitch this to the inside of the coolie hat.
FINISHING TOUCHES: The more beads, sequins and embroidery on the clothes, the prettier the finished doll will look.
ESKIMO BOY
Fig. 1 · Fig. 2 · Fig. 3 · Fig. 4
Follow basic instructions for doll on page 19.
FEATURES: Embroider almond-shaped eyes in black yarn, nose in beige and smiling mouth in red (Figure 1).
HAIR: See method P-28, page 32.
JACKET: Use terry cloth, fur or similar material and cut from pattern design A-6, page 29.
PANTS: Use the same material and cut from pattern design A-1, page 29. Fit jacket over pants and add leatherette belt if desired (Figure 2).
BOOTS: Cut from same material following pattern design A-22, page 30. Use bright color thread to make a design on boots (Figure 3).
HOOD: Cut the toe from second sock and slit from raw edge to tip of toe (Figure 4). Whip stitch raw edges. Sew a band of pom poms (see method P-28, page 32) or a strip of fur along edge that fits around face. A second type of parka can be made from design E-19, page 31. Trim with pom poms or fur.
HULA GIRL
Fig. 1 · Fig. 2 · Fig. 3
Follow basic instructions for doll on page 19.
FEATURES: For eyes, sew two white oval pieces of felt to face. Embroider a line across each one, stitching a small brown button just below. Cut a mouth-shaped piece of red felt and sew into place. A small up-turned nose can be embroidered in brown yarn (Figure 1).
HAIR: Make black yarn pom poms (see P-28, page 32) and sew closely to head.
DRESS: For a halter top, cut a 3″ wide strip of gay soft material, gather a little along bottom and tie around body above waist. Make a tuck at the middle front (Figure 2). For the hulu skirt use raffia, yarn or strips of dyed nylon stocking. Wind yarn around a piece of cardboard 6″ wide about 100 times. Slip a 12″ length of ribbon under loops, leaving ends free (Figure 3). Cut opposite edge of loops, remove carefully and tie around waist (Figure 4). Over this fit a 1″ wide ribbon.
PANTIES: Cut from the same material as top piece, pattern design C-3, page 29.
FINISHING TOUCHES: Push small curtain rings over waists and ankles. Stitch to ears for earrings. Fasten a string of beads around neck to hide seam. Tuck an artificial flower into the hair. Twist several colored pipe cleaners together to make a lei.
COWBOY
Fig. 1 · Fig. 2 · Fig. 3 · Fig. 4
Follow basic instructions for doll on page 19.
FEATURES: Use brown yarn for eyebrows, a line of black for eyelids, nose and mouth. Sew on two flat buttons for eyes (Figure 1).
HAIR: See page 32 for short hair styles.
DRESS: Cut a shirt from checkered material, pattern design A-6, page 28. Seam and fit to body with opening at front. Sew tiny white buttons down front to hide seam. Cut pants from pattern design E-5, page 29, in brown or beige material. Seam and turn. Pleat pants at waist to fit over shirt. Cut leatherette chaparejos from pattern design A-1, page 29, cutting away top as indicated. Use a 1″ width of brown leatherette for belt and finish with a little buckle. Tie a bright three-cornered kerchief around neck (Figure 2).
HAT: Cut from beige felt, pattern A-15, page 31. Shape with fingers (Figure 3).
BOOTS: Cut in black or brown felt from pattern design E-25, page 30.
FINISHING TOUCHES: Sew loops of string or thin rope to one hand. Holsters can be cut from leatherette (Figure 4).
INDIAN
Fig. 1 · Fig. 2 · Fig. 3
Follow basic instructions for doll on page 19.
FEATURES: Sew round brown button eyes over dime-size circles of white felt. Embroider eyebrows in black yarn, nose in brown and mouth in red yarn (Figure 1).
HAIR: See pattern design K-31, page 32. Braid in two parts, one each side of the face.
JACKET: Use brown or beige material and cut from pattern design A-6, page 28. Sew sides, leaving a 1″ slit at waist (Figure 2). Stitch colored fringe, rick rack or beads along the front and bottom of the jacket. Paint, glue or sew colorful Indian sign on back.
PANTS: Use the same material and follow pattern design A-1, page 29. Trim outside of each leg with rick rack or fringe.
HEADDRESS: Fasten a ½″ wide strip of oilcloth or felt around head, tucking a bright feather in at the back (Figure 3). Beads or sequins can be glued to the band for a more colorful effect.
MOCCASINS: Cut from colored felt following pattern design A-22, page 30. Turn down the edges and glue on beads or sequins.
FINISHING TOUCHES: Tie a string of the brightest beads you can find around the neck to hide the seam.
RED RIDING HOOD
Fig. 1 · Fig. 2 · Fig. 3 · Fig. 4
Follow basic instructions for doll on page 19.
FEATURES: Embroider eyebrows, lashes and nose in brown yarn. Use small blue beads or buttons for eyes, red felt for mouth (Figure 1).
HAIR: See J-30, page 32 for pony tail hair style.
DRESS: Cut blouse from any bright material, except red, pattern design C-8, page 28. Cut skirt from same material, design B-14, page 29. Gather around waist and sew to blouse, with opening at the back (Figure 2). Tie a ribbon around the waist to hide the seam.
SHOES: Cut from black felt, pattern design F-27, page 30. Sew a tiny flower to the toe of each shoe.
CLOAK: Use a piece of red material 8″ long by 14″ wide. Hem all sides. Gather along one 14″ side to fit around neck (Figure 3). Cut hood from pattern design P-36. Gather along neck edge and sew to cloak. Tie a strip of white ribbon around neck to hide the seam.
FINISHING TOUCHES: Wire a bunch of artificial flowers to one hand (Figure 4) or a tiny basket over one arm. Make panties and a petticoat from pattern designs if desired.
ROBIN HOOD
Fig. 1 · Fig. 2 · Fig. 3
- GATHER AROUND PANTS LEGS FOR DOUBLET
Follow basic instructions for doll on page 19.
FEATURES: Use brown yarn for eyebrows and nose; red yarn for a smiling mouth. The flat brown buttons with a dot of white on each make the eyes (Figure 1).
HAIR: Use method H-29, page 32.
TUNIC: Use green felt or a semi-stiff material and cut from pattern design A-6, page 28. Cut a 7″ circle of brown felt and remove a portion from the middle 2½″ across. Slit from edge to middle to fit over the head. Scallop around outer edge. This collar fits over the jacket with opening in front. Punch three holes on each side and lace with narrow ribbon (Figure 2).
PANTS: Use soft green material and cut from pattern design B-2, page 29. If the material stretches easily, make the pants tighter than the design, since Robin Hood wears tights. Fit to body, tucking at waist. Fit tunic over pants, add belt and buckle.
SHOES: Make from green felt or similar material following pattern design A-22, page 30. Cut a “V” shaped slit at each side of shoes or roll the top down slightly (Figure 3).
CAP: Cut from green felt following pattern design D-18, page 31. After the cap is sewn on the head, turn the edge up about ½″ at the back. Attach a long red feather for color.
SANTA CLAUS
Fig. 1 · Fig. 2 · Fig. 3 · Fig. 4
Follow basic instructions for doll on page 19.
FEATURES: Sew a small round red bead for nose. Embroider merry blue eyes in yarn, and add heavy white yarn eyebrows. Cut and sew a crescent-shaped piece of red felt for a smiling mouth (Figure 1).
SUIT: Use red material, cut and sew coat from pattern design A-6, page 28, with opening in front. Cut pants from pattern design A-1, page 29. Sew and tuck at waist to fit body.
BOOTS: Make from black felt or oilcloth, pattern D-25, page 30. Sew a tiny jingle bell to each boot.
CAP: From the same material as suit, cut a piece 8″ × 12″. Sew the shorter sides together to form a tube. Gather one end to close.
FUR TRIM: Strips of white fur, terry cloth or rolled white cotton make effective edgings. Sew around cap, neck, front and bottom edges of coat (Figure 2).
FINISHING TOUCHES: Tie a bow of ribbon to a Christmas bell and wire to one hand (Figure 3). Sew a jingle bell to gathered end of cap. Around the waist, fasten a 1″ wide black belt with a buckle in front. Form a beard (from cap to chest) and moustache of white cotton or fur and sew to face (Figure 4).
CLOWN DOLL
Fig. 1 · Fig. 2 · Fig. 3 · Fig. 4
Follow basic instructions for doll on page 19.
FEATURES: For the nose, sew on a large red button. Use two small white buttons with spots of black painted on, for eyes. Embroider highly arched eyebrows in black yarn. Cut a crescent-shaped large mouth from red felt. A single white yarn stitch will divide the lips (Figure 1).
HAIR: Make orange or yellow pom poms (see P-28, page 32) and stitch to head, sideburn fashion (Figure 2).
SUIT: Use bright colored material for jacket and follow pattern design A-6, page 28. Seam and turn. Gather wrists to fit arms. Cut pants from pattern design D-4, page 29. Seam; turn and gather waist slightly. Sew to jacket to make one garment. Gather legs to fit ankles.
HAT: Make a cone from white felt and sew to head at a rakish angle. Turn edges up ½″. Stitch two red pom poms to front of hat (Figure 3).
SHOES: Cut from black felt, pattern design A-22, page 30. Make foot much longer and sew pom poms to tips of toes.
FINISHING TOUCHES: Make a ruffle of 2″ wide stiff net to fit around the neck (Figure 4). Do the same for wrists and ankles. Sew pom poms down the front. Add belt over waist seam.
JACKETS ’N’ APRONS
A6 LONG SLEEVE (CUT TWO)
- CUT ON DOTTED LINES
- CUT ALONG HERE, ONE PIECE ONLY
D9 SLEEVELESS (CUT TWO)
- CUT ALONG DOTTED LINES
- CUT ALONG HERE, ONE PIECE ONLY
C8 TUNIC STYLE (CUT TWO)
- CUT ALONG DOTTED LINE
- CUT ALONG HERE, ONE PIECE ONLY
- SEW ALONG HERE
B7 SHORT SLEEVE (CUT TWO)
- CUT ALONG DOTTED LINES
- CUT ALONG HERE ONE PIECE ONLY
A10 APRON
B11 APRON
C12 APRON
PANTS ’N’ SKIRTS
A1 LONG PANTS AND CHAPS (CUT TWO)
- SEW ON DOTTED LINES
B2 SHORT PANTS (CUT TWO)
C3 PANTIES (CUT TWO)
- CUT ON DOTTED LINES
D4 WIDE PANTS (CUT TWO)
- SEW ALONG THIS LINE
- CUT HERE
- SEW ALONG THIS LINE
E5 NARROW PANTS (CUT TWO)
- CUT ON DOTTED LINES
A13 LONG SKIRT (CUT ONE)
- GATHER ALONG THIS EDGE
- CUT ON DOTTED LINE
B14 SHORT SKIRT (CUT ONE)
- GATHER ALONG THIS EDGE
- CUT ON DOTTED LINE
SHOES ’N’ BOOTS
A22 LACED SHOE
- ① CUT TOP
- ② CUT SOLE
- ③ SEW TOGETHER
- ④ LACE
B23 DUTCH SHOE
- ① CUT TOP
- ② CUT SOLE
- ③ SEW TOGETHER
- ④ TURN DOWN
C24 POINTED SHOE
- ① CUT TOP
- ② CUT SOLE
- ③ SEW TOGETHER
- ④ TURN DOWN
D25-E25 BOOTS
- ① CUT TOP
- ② CUT SOLE
- ③ SEW TOGETHER
- ④ LACE, IF DESIRED
E26 LOW BOOT
- ① CUT TOP
- ② CUT SOLE
- ③ SEW TOGETHER
F27 SLIPPER
- ① CUT TOP
- ② CUT SOLE
- ③ SEW TOGETHER
HATS—CAPS—HOODS
A15 BRIM HAT
- ① BRIM
- ② TOP
- ③ SEW TOGETHER
B16 TOP HAT
- ① BRIM
- ② TOP
- ③ SIDES
- ④ SEW
C17 TAM
- ① CUT TOP
- ② CUT BOTTOM
- ③ BAND
- ④ SEW BAND
D18 ROBIN HOOD
- ① CUT HAT
- ② SEW
E19 DUTCH BONNET
- ① CUT HAT
- ② CUT BACK
- ③ SEW
P36-F20 HOODS
- ① CUT
- ② SEAM
- ③ SEW HEAD BAND
G21 COOLIE
- ① CUT HAT, SLIT TO CENTER
- ② JOIN EDGES
- ③ SEW BAND
CONE HAT
- ① CUT TRIANGLE
- ② MAKE CONE
- ③ TURN EDGE UP
STOCKING CAP
- ① CUT OFF TOE
- ② HEM RAW EDGE
HAIR ’N’ FACIAL EXPRESSIONS
H29 SHORT LOOP
- ① DRAW HAIRLINE
- ② MAKE LOOPS
- ③ COVER
P28 POM POMS
- ① WIND YARN
- ② CUT
- ③ SEW TO HEAD